Friday Five: Facts about Backyard Chicken Eggs

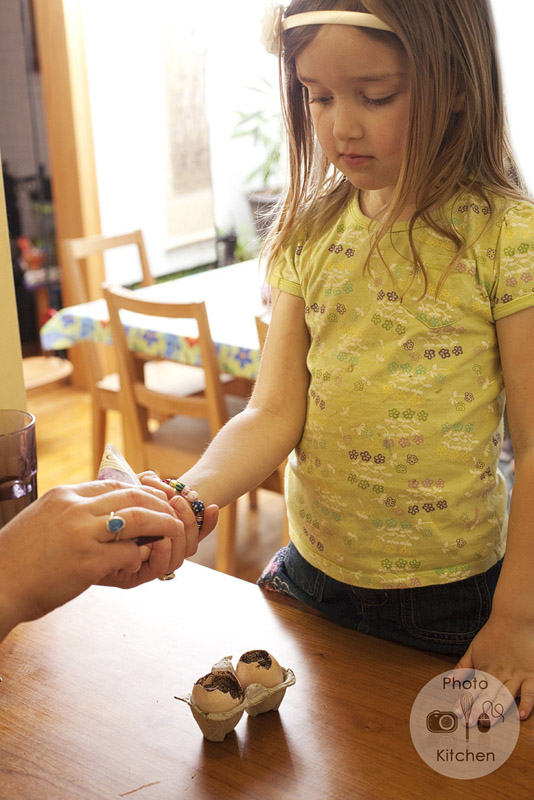
The talented Catherine of Photo Kitchen came over last week to take photographs for Hounds in the Kitchen Egg Week. Today's conclusion follows tutorials for blowing out eggs, making natural dyes, baking a dutch baby, and creating eggshell seedling cups. child holding a backyard eggA year and a month after collecting our first pullet egg, we have learned a few things. Today we share our top five facts about backyard eggs.

1) Eggs are laid with a special impermeable coating that keeps them fresh at room temperature. So long as we have space, we still refrigerate ours, but it's nice to know that they are edible for weeks if we want to store them on the counter.

2) Fresh eggs, hard boiled, are difficult to peel. As eggs age, they lose moisture and naturally detract from the shell. Very fresh eggs are so full of moisture that the white sticks to the shell like it is hanging on for dear life. Adding a few tablespoons of white vinegar to the boiling water increases 'peelability'.

3) Hens lay eggs without a rooster. Eggs are the product of a hen's menstural-like cycle, one which goes on whether a rooster is around or not. Conversely, eggs will not develop into chicks unless a rooster fertilizes them. Children are usually sad to learn that our eggs will not turn into baby chicks.

4) Each breed has a uniquely colored and shaped egg. We can identify who is laying and who is not simply by the color and shape of the eggshells collected. Some breeds, like the Aracuana and Barnevelder, are recognized for the unusual color of their eggshells.

child collecting eggs in a backyard coop

5) Collecting eggs is a treasure hunt for the most versatile ingredient we can raise ourselves. Whether Lil up-ends herself into the coop or Alex and I reach into the nest box, we are delighted on a daily basis at the golden jewels we find.

All photos with the Photo Kitchen watermark belong to Catherine and were generously shared with me. You may purchase copies and view the whole set of photographs in the online gallery. Use the coupon code houndscrossover to receive 25% off prices until May 15.

P.S. Happy Earth Day! May you challenge yourself to a greener lifestyle, enjoy America's natural resources, and perhaps even procure some free earth-friendly goodies like a Northstar veggie burger.


Added to Fight Back Friday April 22.

Eggshell Seedlings

The lovely Catherine of Photo Kitchen came over last week to take photographs for Hounds in the Kitchen Egg Week. After blowing out eggs, dying with natural dyes, and baking a dutch baby, we were left with an excess of shells.

empty eggshells for seedlings

We could have tossed the shells in the compost. Instead, we aimed to recreate some easter eggshell planters Lil has been coveting at the big box home improvement store.

dirt in eggshells

All we did was fill an eggshell with potting material and a few seeds for Lil's favorite herb, chives. Then we watered the shells and placed them under lights with the rest of our seedlings.

planting seeds in eggshells

After the frost free date, we will transplant the whole set up into a bed outside. The calcium rich shell with break apart and dissolve in the soil, giving nutrients to the plant.

I would not advise planting carrots or other root vegetables in eggshells because they need unencumbered space to grow straight down. Most other seeds are fair game for starting in shells.

If you don't have a grow light, try planting a few dry beans in shells in a sunny window. Though beans don't need to be started indoors, they are very quick to sprout and grow fast enough to satisfy even the most impatient child.

All photos with the Photo Kitchen watermark belong to Catherine and were generously shared with me. You may purchase copies and view the whole set of photographs in the online gallery. Use the coupon code houndscrossover to receive 25% off prices until May 15.


Added to Simple Lives Thursday 40th Edition.

Fruity Dutch Baby Recipe

The lovely Catherine of Photo Kitchen came over last week to take photographs for Hounds in the Kitchen Egg Week 2011. On Monday and Tuesday I shared how to blow out eggshells and decorate eggs with natural dyes. Stay tuned for tomorrow's eggshell seedlings and Friday's tips and tricks.

cutting apples for dutch baby recipe

Today I am sharing a recipe that is not only delicious and simple, but has a name that will delight kids and garner odd stares from unsuspecting adults.

A dutch baby is a popover-like breakfast baked good, often sweetened. Useful for using up excess backyard fresh eggs, we add fruit for a hearty and nutritious meal.

Like so many simply delicious foods, a dutch baby requires proper preparation, or mise en place. I usually start with the fruit. Core and slice apples, pears, or plums thinly. Washed and halved cranberries or cherries are welcome additions. Have flour, egg, milk, and salt on standby.

The other key to this recipe is the proper pan, in this case a cast iron skillet.  A properly seasoned skillet discourages sticking and the pan holds heat to cook the pancake quickly.

dutch baby recipe melt butter

Preheat the oven with a cast iron skillet inside. When the oven comes to temperature, add in the butter to melt but not burn.

dutch baby batter and apples

Meanwhile, whisk up the batter of eggs, flour, and milk, flavored with vanilla, cinnamon or nutmeg if you like. The batter is measured with the simple the popover ratio below. I also listed the exact measurements to fill a 12 inch cast iron skillet and feed four.

making a dutch baby recipe

Just as the butter is melted, layer brown sugar and fruit on the bottom of the skillet. Top with batter and return to the oven.

cooked dutch baby in pan

20-30 minutes later, a golden puffy pancake is ready to emerge. Turn it out of the pan, slice, and serve as is or with powdered sugar and/or lemon juice. Crisp on the outside, warm and soft on the inside, a fruity dutch baby is a textural treat.

homemade apple dutch baby serving

[print_this]

Fruity Dutch Baby

Popover Ratio

1 egg : 1/2 cup milk : 1/2 cup flour : 1/4 teaspoon salt

Recipe to fill a 12 inch skillet serves four

3 tablespoons unsalted butter 3 eggs 1 1/2 cups milk 1 1/2 cups all-purpose white flour 3/4 teaspoon salt 1/2 teaspoon vanilla, optional dash, nutmeg, optional 1 large apple, peeled and sliced, or 1 cup of other fruit 1/4 cup brown sugar 1/2 teaspoon cinnamon, optional

1. Heat oven to 350 degrees F. with skillet in the oven on middle rack. 2. When warm, place butter in the skillet to melt. 3. Whisk eggs, milk, flour, salt and optional vanilla and nutmeg. 4. When butter is melted, carefully sprinkle brown sugar and cinnamon over the bottom. Arrange apple sliced on top of that. Pour batter over the apples and return to the oven. 5. Remove the dutch baby from the oven in 20-30 minutes, when top is browned. Turn out from pan and serve warm with powdered sugar and lemon juice, if desired.

[/print_this]


All photos with the Photo Kitchen watermark belong to Catherine and were generously shared with me. You may purchase copies and view the whole set of photographs in the online gallery with password lileaster. Use the coupon code houndscrossover to receive 25% off prices until May 15.

Making and Using Natural Egg Dyes

The lovely Catherine of Photo Kitchen came over last week to take photographs for Hounds in the Kitchen Egg Week 2011. Yesterday, I shared how to blow out eggshells. Continue reading for recipes, tips, and even an eggshell planting project. eggs in natural dye

Encouraged by my friend Vanessa Prentice, I made egg dyes from edible materials this year. I was surprised to find that natural dyes are easy to make, completely safe to consume, and don't stain your fingertips.

I made dyes from purple cabbage, red beet, and ground tumeric, pictured left to right above. Other edibles that Vanessa recommends include blueberries (purple color), tea (light brown), and coffee (dark brown). Green is a particularly difficult color to achieve, she says.

I boiled the edible materials in water with a splash of vinegar to act as a mordant. A mordant is a chemical that encourages dye to attach to a surface. These mixes simmered until the colorful edible until the liquid was brightly colored, about an hour.

I strained out the solids and poured the liquids into jars. Because I was using them the next day, I stored the dye in the refrigerator overnight.

Next, I gathered the prepared the eggs for decorating. Some were boiled and most were blown out for a more permanent canvass.

Lil wrapped the eggs in string, tape, or rubber bands for patterns. Shaped stickers also make white space on the shells.

eggs wrapped in rubber bands for resist dying

Finally, it was time to dunk the eggs. I should have predicted that the hollow eggs would float, but I didn't until we actually observed them. Because we wanted solid colored eggs, I gently weighed them down with glass jars on top of the dye.

weighing down blown out easter eggs with jars

The hardest part came next: waiting. Natural dyes make the deep rich colors if left in the dye bath for 24 hours. The blue egg in the picture on left was in the bath for about 2 hours; the one on the right soaked for 24 hours.

blue easter egg dyed with red cabbage leavesblue egg dyed with red cabbage

Finally we had a rainbow of dyed eggs with fun patterns! Are you dying eggs this year? Will you experiment with natural dyes?

rainbow of naturally dyed eggs

All photos with the Photo Kitchen watermark belong to Catherine and were generously shared with me. You may purchase copies and view the whole set of photographs in the online gallery. Use the coupon code houndscrossover to receive 25% off prices until May 15.

Added to Hearth and Soul Volume 44.