Forecasts for central Ohio predict some of the coldest temperatures in decades over the next few days. We're preparing the wood stock, reinforcing the livestock (straw bales everywhere!), and planning a menu of warm foods.
One reality of keeping animals is that we must go outside several times a day to tend them every day, more often in the coldest weather. With adequate preparation, appropriate gear, and a smooth routine, chores in the cold feel more like a triumph than, well, a chore.
Mentally Prepare -
Every morning in the winter, I lay in bed for at least fifteen minutes readying myself to put my feet on the floor. It's not that I don't want to wake - it's that my first task of the day is to head outside with the dog and a chicken waterer to open up the coop. My face full of wind and snow is not a gentle way to start the day, but the thought of my hens waiting in the coop motivates me to face the weather.
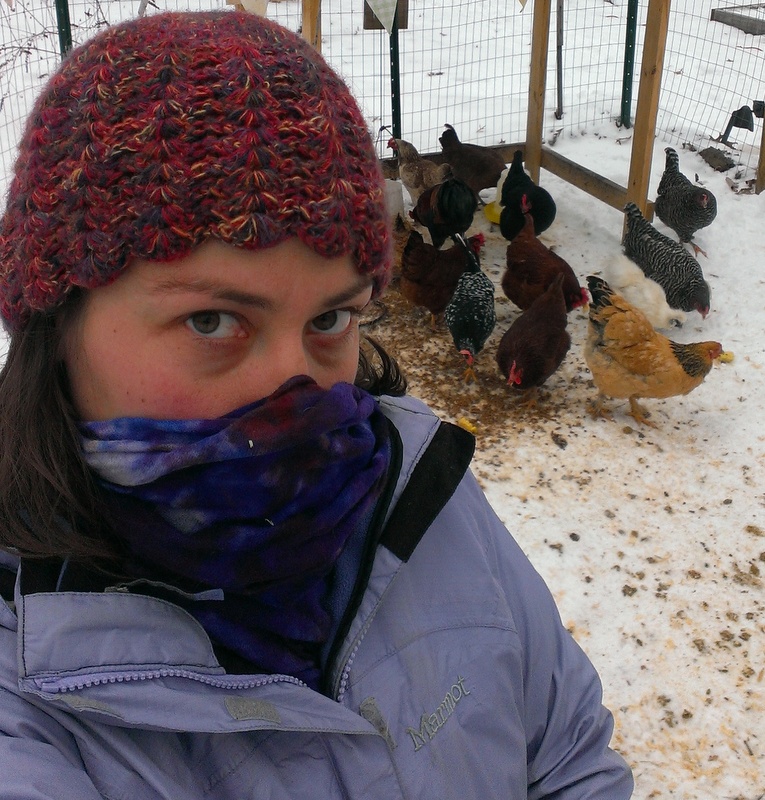
Dress In Wool, Silk, and Fleece Layers -
To feel most comfortable, cover your body in materials that insulate even when wet, with no breaks where cold air can come in. Layers create pockets of air around your body that will stay warm from your own body heat.
My base layer everyday is usually fine merino wool. If I'm just feeding the chickens, I'll put jeans and a sweater on top. If the chores are more lengthy, I choose Carhartt Overalls

Compiling adequate layers can take years of investing in quality pieces. We like to shop REI outlet and Sierra Trading Post for discontinued and clearance clothing from reputable makers like Marmot, Smartwool, and Mountain Hardwear. Thrift stores are a great source of fleece, wool tops, and boots.
Gather Supplies Under Shelter -
If at all possible, stay out of the wind and precipitation as often as you can, especially when gathering supplies. We rotate our chicken waterers, keeping the empties in our mudroom so we can fill them in the house. When I'm taking out compost, ashes, or trash, I stage those in the mudroom so that I can grab them quickly without tracking snow in the house and letting cold air in. Similarly, we use the garage for supply and tool storage. Every tool has a place so that we aren't outside searching in cold weather.
Work Quickly -
When you finally make a break through the wind-chill and snow, work as efficiently as possible without making mistakes. Spills are the worst because wet clothes are heavy and uncomfortable, though if you've chosen wool, silk, and fleece, they will still keep you warm. Skip mentoring children through chores or tackling a big project in frigid weather - keep your outside tasks to a minimum to avoid frustration and frostbite.
Warm Up With A Hot Drink -
Finally, come inside and warm up. Unwrap the layers and change into something dry if you're wet from precipitation or sweating. I turn on the tea kettle as I walk in the door and warm up from the inside out with hot tea, coffee, or a rum flip, depending on the time of day. If hot drinks aren't your thing, do sip on a glass of water - your body dehydrates rapidly in cold weather. Bask in the triumph of braving the weather and completing your chores in (relative) comfort!
How do you stay comfortable during winter outdoor chores?