
What's going on inside the hoop house we built?
1) Garden beds of Price Farm Organics soil from City Folks Farm Shop and peat moss over cardboard broken by walking paths of landscape cloth covered by mulch. Alas any gaps between the cardboard and cloth are already growing weeds...
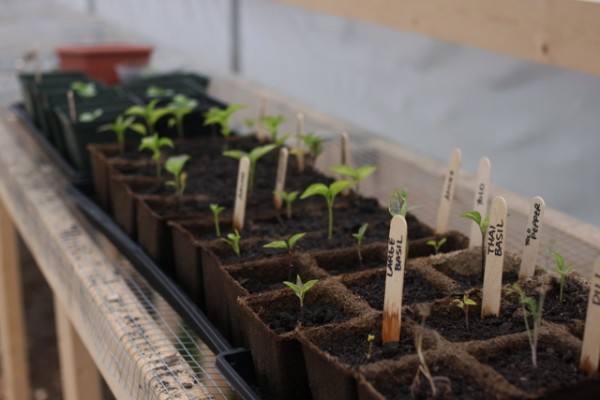
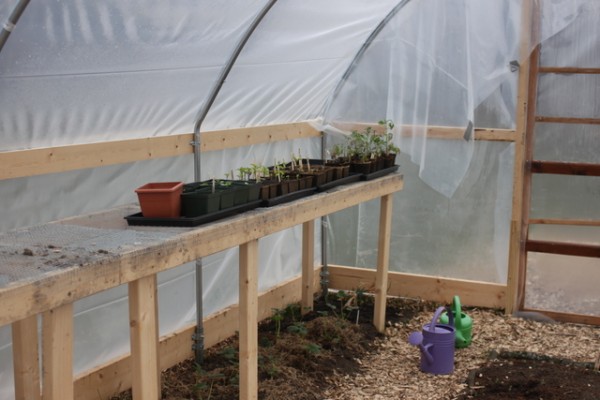
 2) Seedlings hardening off on the hardware-cloth shelves.
 3) Strawberry plants under the shelves where water drains down from seedlings.
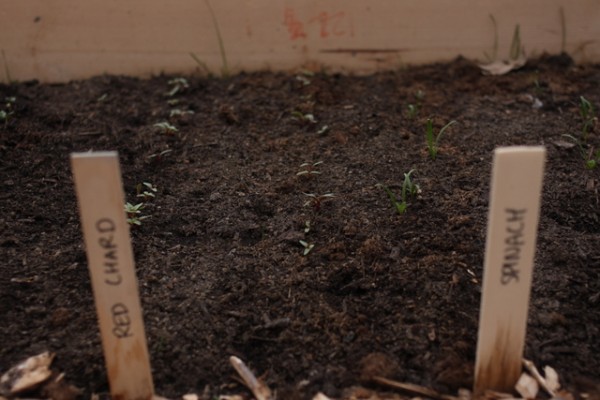
 4) Cold-tolerant food like kales, lettuces, and beets.
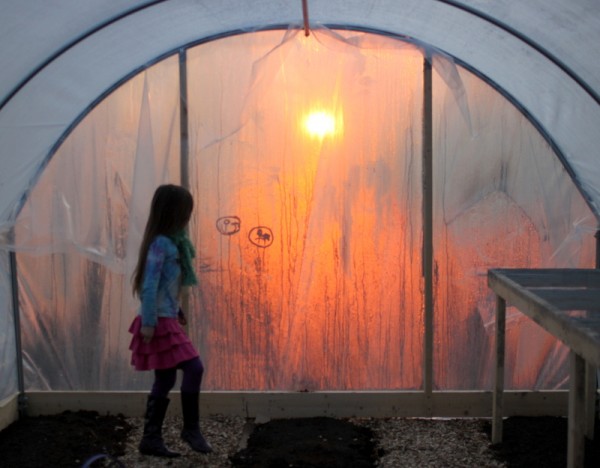
 5) Friends and family hanging out. The hoop house is always warmer than the outside; on the days reaching 70 deg F recently, the
 hoop house sauna was positively steamy!

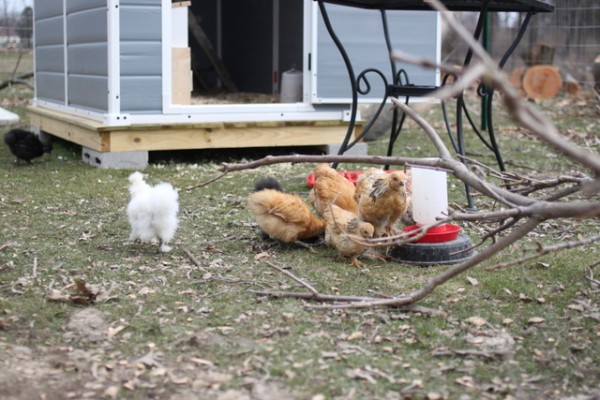
Chicks New Digs - Shed-Conversion Chicken Coop
 This blog has been fairly quiet recently because we're taking advantage of dry weather to work on dozens of outdoor projects. Setting up a homestead is enough work to occupy us for years!
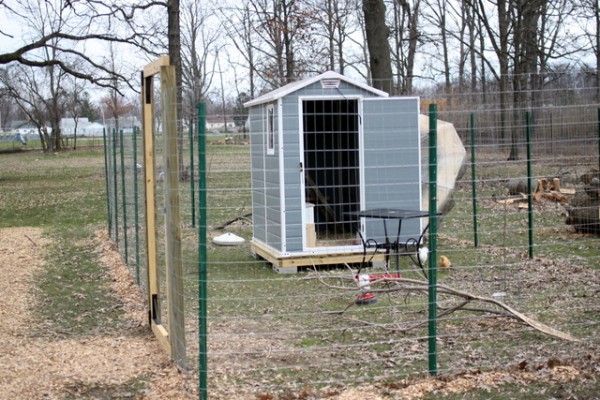
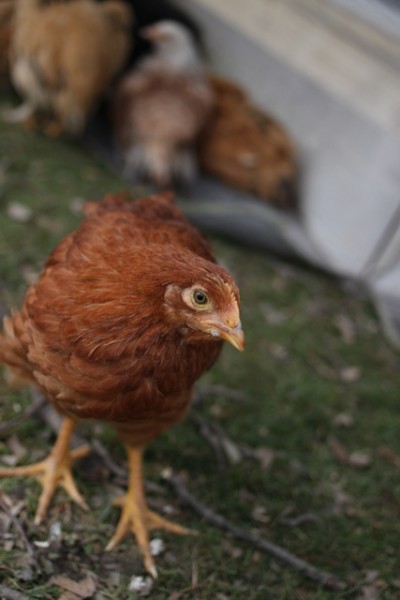
One project that could not be ignored is setting up a new chicken coop and run for our growing chicks, now eight weeks old. While we love our chicken tractor, and will keep it around for potentially housing meat birds, it didn't allow for a lot of run room and we wanted a coop we could walk into.
We researched options and ultimately bought a plastic shed kit because it was cheaper and easier than making something from lumber. We designed all inside fixtures as freestanding items so that we can potentially reuse the shed for another purpose if we need.
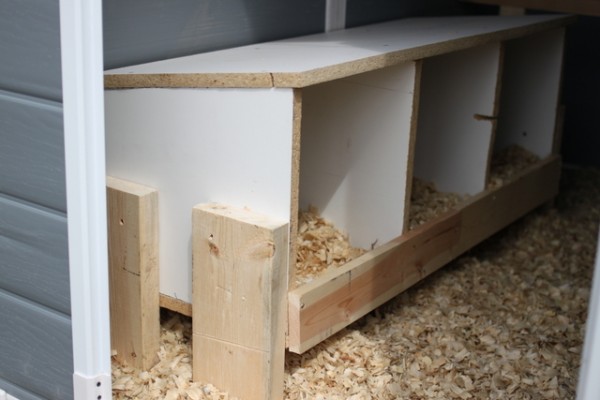
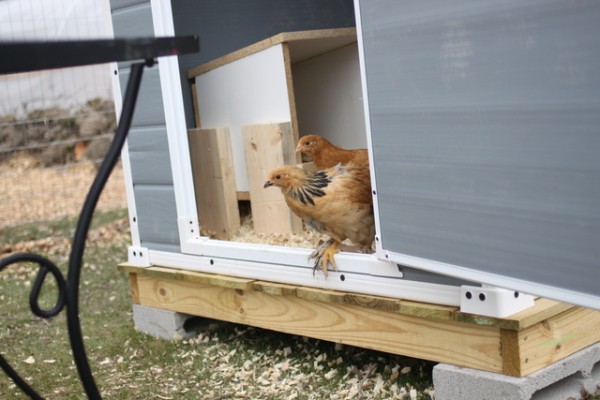
Alex, Lil, and I worked together to put the shed up in a few hours one afternoon. We outfitted the inside with an old ladder and scrap-wood roost bar. Alex built a free standing nest box from scrap melamine sheet and lumber, though our only laying hen isn't choosing to use it yet.
The coop rests on a base of treated lumber atop cement blocks. When the chicks are a little bigger, we will add a few more layers of cinder block to raise the coop and allow a shady spot underneath.
Building The Run
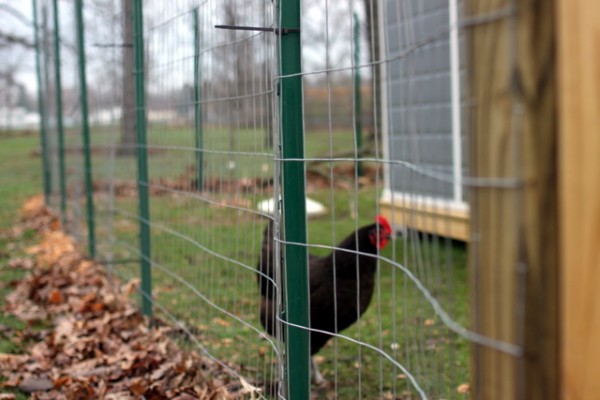
We debated whether to invest in electric fencing or wire. Ultimately we choose 72 inch welded-wire with metal posts because it was slightly cheaper, reusable and less breakable, and will hopefully help prevent deer from intruding the run to nibble at the fruit trees planted inside.
I began the fenced run by setting stakes to represent the corners and squaring them up using the 3-4-5 method. When the corners were finally in place, I ran a string around to guide placement. I dug a six inch trench by hand to settle the fence in the ground.
The next day, Alex set metal posts in the ground and attached the welded wire to the posts using zip ties. Classy.
I filled in the trench with mulch. Mulch is quickly becoming our favorite ground cover material because it's free from the tree service we're using. Finally Alex built a gate.
Predator Prevention
Arial and ground predators are a significant threat to chickens. We have seen possum, raccoon, fox, deer, and hawks in our yard, all of whom would love a bite of chicken.
To prevent the nocturnal predators, we lock the chickens in their coop using a two-part latch every night. This is actually a rather comical event because the chicks don't yet know when it's time to roost so we have to catch them one-by-one to put in the coop. They don't seem to be using the roost bars yet but maybe they will when the are bigger.
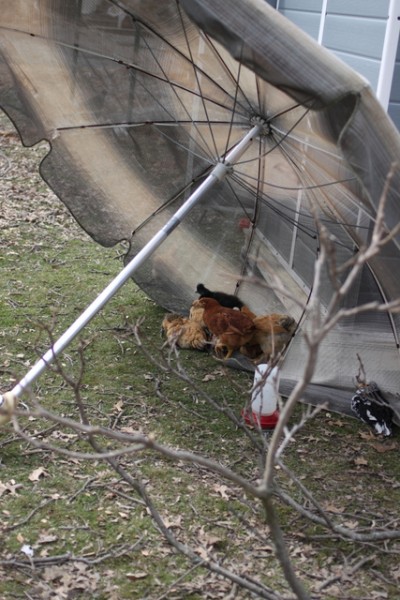
The old umbrella, table, and branches strewn around the run are not debris - they're intentional. We strategically placed them to give cover from raptors. Chickens do have an instinct to run for cover; the girls have been spending a lot of time hiding out under the umbrella. Our plan is that the fruit trees will grow to provide shade and predator cover eventually, but in the meantime the run looks like a junk pile on purpose.
This is our fourth chicken coop and hopefully our last for a long time. It's isn't as glamorous as some but we expect this set-up to be weather- and predator-tight and easy to access. So far, the chicks seem to dig it.
PS. If you're a blogger, check out my guest post at Be Up & Doing about the technical mechanics behind switching from HoundsInTheKitchen.com to HarmoniousHomestead.com.
Probiotic Ranch Dressing Recipe with Food Bloggers Against Hunger
 Have you ever been hungry? Really hungry like the 16.2 million kids in America who are food-insecure living in families without the means to regularly put nutritious food on the table?
I'm hangry when I forget to eat a big breakfast before becoming immersed in a project and suddenly it's two pm and I want to eat RIGHT NOW. I was hangry yesterday, in fact. I was surrounded by healthy food; I only had to stop a moment to prepare and eat it and my belly would be full. I thankfully have never been truly hungry.
But 48.8 million Americans struggled with hunger at some time during the year 2010. 1 in 4 Americans used at least one of the 15 USDA food and nutrition assistance programs. While many local food advocates like me disagree with some of the food choices available in some USDA nutrition programs, there's no denying that any food, even factory-farmed food, is better than no food at all for those who are hungry.
A country as great as America is cannot stay this way when children and families are hungry. Children cannot learn in school, crime and domestic unrest increase, and our national productivity declines when people are unable to meet their most basic needs.
My family delivers food donations to our local food pantry. We plant extra rows in our garden and share our harvest. The farmers' markets I work at collect fresh seasonal food for donations. But this type of charity is clearly not enough to meet the need when food pantries are inundated with hungry families.
To truly eliminate hunger, governmental leaders must continue to address and fund anti-hunger and anti-poverty programs. Take 30 seconds now to send a letter to Congress lending your voice to the cause.
When you have a little more time, consider the new film A Place At The Table documenting the complex problem of hunger in America. Accompanied by the music of T Bone Burnett and The Civil Wars, the picture also promotes solutions. Find a viewing of the film in your city or on demand through iTunes and Amazon.

Today, April 8, food bloggers around the world are sharing recipes to address hunger. I am proud to contribute my recipe for probiotic ranch dressing to the Food Bloggers Against Hunger project.
One way my family saves money at the grocery and adds flexibility to our dining is by making our own salad dressings. A bottle of dressing is at least a few dollars at the store and often includes manufactured oils, sugars, and stabilizers that I would prefer not to feed my family. The ingredients to make simple, fresh dressings at home are cheaper and healthier.
We whisk together this buttermilk ranch dressing recipe frequently because it pairs well with fresh greens in season now and is useful as a dipping sauce too. It uses buttermilk and sour cream, both full of live active cultures that can aid digestion.
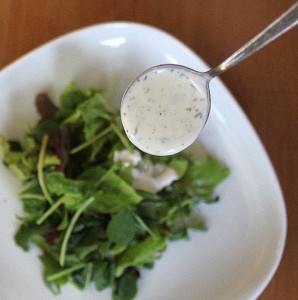
Probiotic Ranch Dressing Time: 2 minutes active, 30 minutes inactive Makes: 1 cup
1/2 cup buttermilk with live active cultures 1/2 cup sour cream with live active cultures 1-2 teaspoons minced garlic chives (can be grown from a sprouting garlic clove planted in a pot of dirt or foraged from your backyard if you are lucky like us and they grow wild in your area) 2 teaspoons minced fresh parsley or 1/2 teaspoon dried parsley 1 teaspoon minced fresh oregano or 1/2 teaspoon dried oregano flakes 1/2 teaspoon finely ground black pepper salt to taste
1. Mix all ingredients. Adjust consistency to your liking by adding more sour cream for a thicker dressing or more buttermilk for thinner dressing. 2. Refrigerate for at least thirty minutes to allow flavors to combine. Taste and adjust seasonings as desired. 3. Serve within one week.
How We Built A Hoop House

What do you get when you combine 500 square feet of UV-resistant plastic, twenty four intrepid individuals and twenty hours of work in the cold? An unheated, season-extending plant paradise otherwise known as a hoop house!
We built our hoop house as a workshop under the expert guidance of Joseph Swain, farmer at Swainway Urban Farm, and building assistance from Gerry Fiegelist, co-owner of City Folks Farm Shop. We chose to purchase a 10x20 foot EZ Build & Gro cold frame kit from Growers Supply for the materials.

Joseph and Gerry started the process with me by selecting a site. A hoop house does it's job best with the long sides running East-to-West to take advantage of winter southern exposure. We chose a site away from overhanging branches that could fall and create holes in the plastic. Our hoop house is relatively close to the house and (future) rain barrels to facilitate watering and daily care.
We proceeded to spend nearly two hours setting the post bases. We measured the distance between corners and then adjusted to get them square. We used the 3-4-5 method to square each corner and measured distance between corners again. We moved the stakes over and over, measured diagonals, and moved stakes again. Finally, we felt everything was square and it was time to pound in the metal posts, leveling between each.
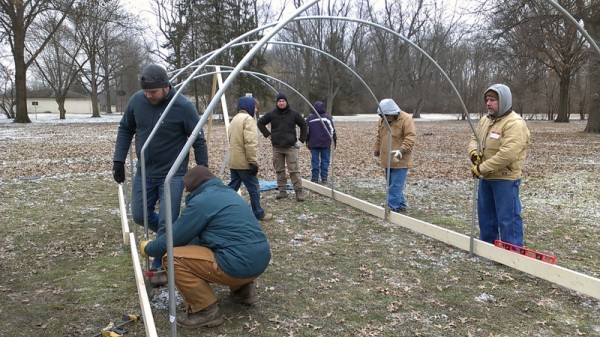
The following Sunday, twenty people joined our team to learn and help build the hoop house. We fit together metal hoops and arranged them near the posts. Following the Growers Supply directions, we mounted the hoops and then the purline with provided self-tapping screws. We built base boards and side supports from untreated pine lumber and attached these with u-bolts to the hoops.
Next, the team attached u-channel to the side supports and end hoops. The insulating plastic is held in the u-channel with 'wiggle wires', wavy-shaped metal that can be removed should the plastic need to be adjusted or replaced. We wrapped up the workshop portion of the build around this time so people could go home and warm up from the chilly day.

Gerry and Alex stayed on to build a door frame in one end from more pine lumber. We called it a day because with windy conditions and heavy snow predicted, we didn't want to fuss with the plastic.
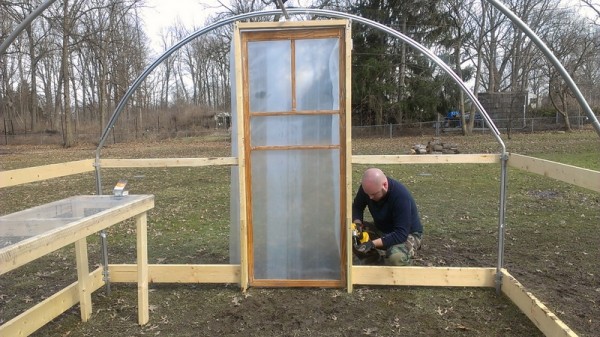
A week later, weather was right to build the last end of framing. Alex installed the door and built a simple frame for the opposite end.
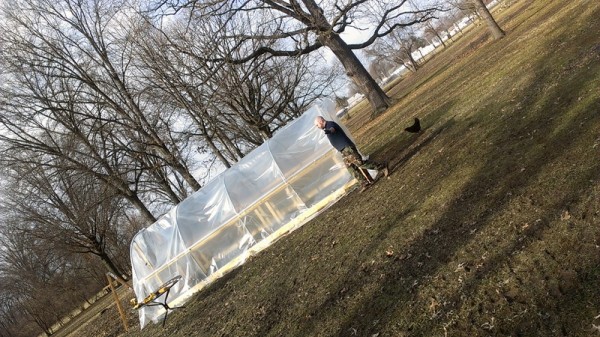
Finally it was time to cover everything with plastic. Far from an easy task, this required the full attention of Alex, Lil, and I. A lucky gust of wind lifted the plastic at just the right moment and frantic placement of logs held it in place while we pressed the wiggle wire into the first end channels. We pulled plastic and adjusted wiggle wires until the hoop house was fully enclosed.
Hoop House Construction Lessons Learned
- The kit from GrowersSupply.com
was complete and ultimately saved money over sourcing items separately. We are very pleased with the quality of the materials and the thorough instruction booklet.
- The downside is that the kit has to be delivered by freight truck. They gave us a delivery date but no time and of course showed up when I had run out so Alex had to unload by himself.
- Screwing the self-tapping screws through metal is shoulder-wrenching work. I could not have done it and am so thankful for Gerry, Alex, and others who took on the task. In hindsight, it might have been a better idea to drill pilot holes.
- The lengthiest part of the process was measuring and setting the post bases but ultimately that made the rest of the build go together smoothly. Don't skimp on this step.
- Holding a workshop where people pay to help build sounds like a great idea. Indeed, our portion of the registration fee did offset some of the cost of the materials and it was fun to meet interested local gardeners. We are thankful for everyone who came out to learn and help. But communicating, cleaning, arranging furniture, cooking lunch, and cleaning up after the participants increased our workload many times over. Because the date was set for months, we had to build on a less-than-ideal weather day which slowed the build and restricted many participants. All things considered we might offer a build again recognizing that hosting requires a large outlay of time and energy in exchange for the income of workshop fees.
Next week I'll share how we set up the inside and plan to use the hoop house.
Y'all Come to Home Ec. Comfort Food April 15
 What does 'comfort food' mean to you? Is it the sweet starchy goodness of Daddy's biscuits or the warm soothing flavor of Granny's green beans? Perhaps a drink with friends?
Join the club of hungry folk known as Home Ec. Off Campus - Columbus to discover comfort food in many forms this month. We'll gather at Rehab Tavern on Monday April 15 at 8 pm.
The 'rules' for Home Ec events are simple:
- bring a home-made dish that fits the theme as you interpret it
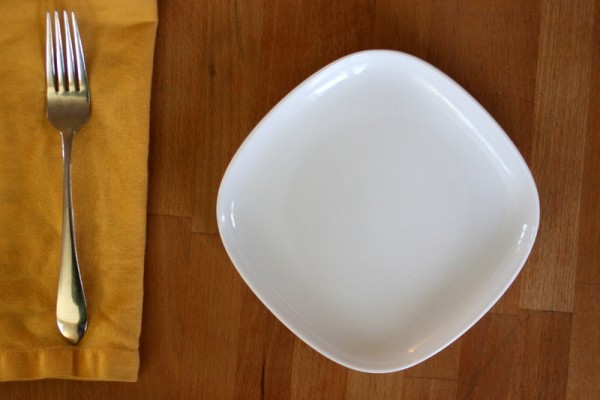
- pack a plate and silverware to help us reach our no-waste goal. One Columbus Home Ec'er brings a Japanese bento box with integrated chopsticks, perfect!
- have fun! These events aren't about competition, they're about sharing good food with friendly people.
If you aren't in the Home Ec homebase of Toronto or spinoff site Columbus, join the fun online by tagging social media posts #wphomeec on April 15.
What's your favorite comfort food?
Food = Love Indian Paneer Cheese {Recipe Guest Post}

I am pleased to share an authentic Indian paneer cheese recipe today from Susan Saldanha. She is a Columbus cook originally hailing from India who teaches custom cooking classes about Indian culinary traditions for groups and individuals in your home. Contact Susan by email to experience her healthy, delicious take on Indian cooking.
June 2012 was memorable because I went back home to India after eight long years. Landing in Mumbai India I was hit by the heat, the humidity, the flood of humanity and a hunger in your belly. I began to realize I missed all of this so much.
My mom grumbling to a visiting neighbor awakened me one sweltering afternoon. In muted tones she said "Mrs. Advani, please stop sending food. All the neighbors bring her food claiming it was her favorite dish when she was a girl and I don’t get a chance to cook for her. After all, she’s my daughter visiting after eight years."
In India, Food= Love and believe me I had a lot of good “love” growing up.
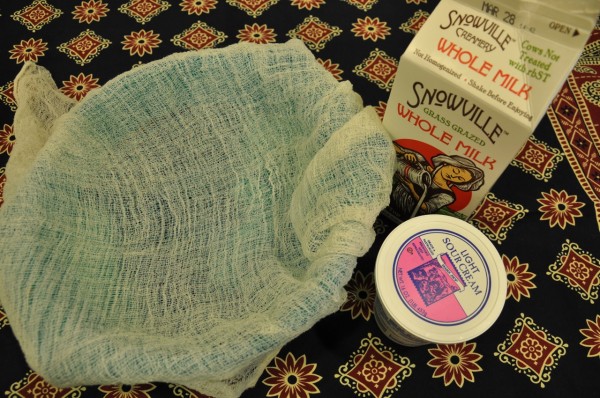
Today I will share with you a taste of my Motherland: a Paneer cheese recipe. This is often eaten in the US as Mattar Paneer (peas and paneer) or Palak Paneer (spinach and paneer). Paneer comes from Northern India. It is a fresh milk cheese that is easy to make. Highly nutritious, it is a great source of protein. Its subtle flavor profile allows it to absorb the Indian spices very nicely but can be eaten by itself as a delicious ‘anytime-snack.’
How to Make Paneer
Ingredients
-
4 cups of whole milk
-
3/4cup sour cream or yogurt (sour cream adds a decadent lusciousness to the paneer)
-
Cheesecloth folded over to give you four layers
-
Colander
- Heavy bottomed pan

 Method:
- Bring the milk to a boil on a medium flame in the heavy bottomed pan. Keep the flame on medium as milk burns very easily and will add a burnt taste to your paneer.
- Add the sour cream and keep stirring gently. Turn the heat up to high to facilitate the curdling process.
- The milk will begin to appear lumpy and will have light green whey around it.
- Strain the whey in a cheesecloth lined colander.
- While the paneer is still in the colander run cold water over the paneer till it cools down. Squeeze as much of the extra water out of the paneer as you can by twisting the lose ends of the cheesecloth.
- While still in the cheesecloth place the paneer under a weight (a heavy pan or a foil lined brick) on your counter for about 1-2 hours.
- Unwrap the paneer and cut it into cubes. It’s ready to eat.
-
Paneer keeps in the refrigerator for up to 3 days. Freezing is possible and cutting it into cubes before you freeze it is a good idea. After thawing you have to lightly fry (preferably in homemade ghee) on both sides before you use it in cooking or else it tends to break apart.
Serving suggestions:
In my home we eat paneer fresh and love it with a slight drizzle of honey or on a toothpick with a small piece of pineapple and a sprinkle of chaat masala. (Chaat masala is a spice blend used on a variety of snacks and has spicy, salty, and sweet tones. It is available in any Indian grocery store.)
Note from Rachel: Our favorite Indian cooking book is 1,000 Indian Recipes 
Weekend With Guests From Japan
 Once again we opened our home to guests from Japan this week. Long-time readers may recall when we hosted Kayoko and Anna in summers past through the Ohio 4-H Program. Hosting international guests has so many benefits that of course we said yes when asked by daughters of our friend Naoko if they could stay with us for a few days.
I was pregnant with Lil when we hosted Naoko in 2005. She mothered me through a hot summer, creating a special bond between us. We met her daughters Maiko and Yuiko on our trip to Japan in 2007 and welcomed the chance to house them for a few nights this weekend during their short spring break vacation to Ohio.
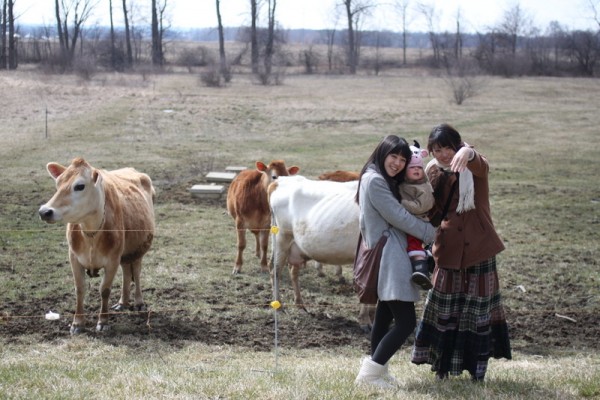
Maiko and Yuiko arrived on Thursday evening after a lengthy wait on stand-by in the Chicago airport. On Friday, we drove North out of Columbus to see Amish and visit with the animals at Six Buckets Farm. We came home for dinner with friends which featured venison sausage and pie that Maiko helped cook.
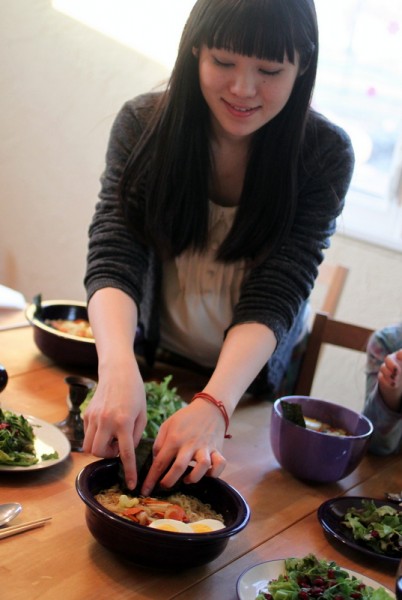
On Saturday, the girls shopped the Worthington Farmers' Market and Mall. We visited my father-in-law's studio and City Folk's Farm Shop before Maiko and Yuiko made us ramen for dinner.
We saw Maiko and Yuiko off to another friends' home on Sunday. Their visit was short and we couldn't show them everything we wanted to, but that's OK. We're building a relationship sure to last a lifetime with more visits over the years.

It's that time of year when Ohio 4-H is looking for host families again for July 24-August 19, 2013. You don't need to be a 4-Her or have any special plans this summer - the children coming here want to see real life in a family with a 10-15 year old host sibling. If that's you, please read the Ohio 4-H International Program website to fill out an application or contact me for more information.
Seasonal Snaps: Spring Equinox 2013
The homestead has changed in many ways since I posted Winter Solstice 2013 Seasonal Snaps, though I felt wind on my cheeks and spied snow in the air on both photography days. Mostly we have been building and hauling; we're eager to finally see edibles growing at the next turn of the seasons. Not much action in the front yet, pictured in fleeting sunlight.
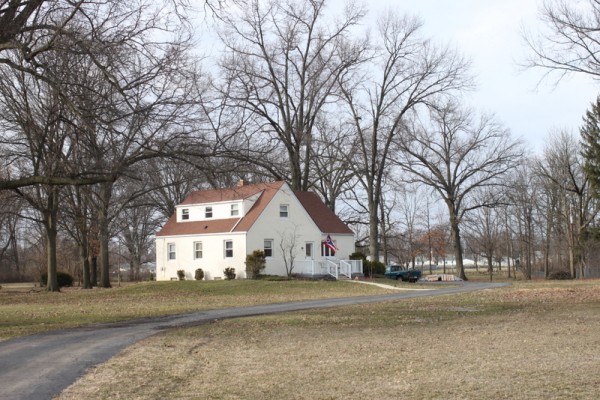
Careful eyes will spot the new mailbox at the road, a result of a drunk driver smashing our old one to smithereens.
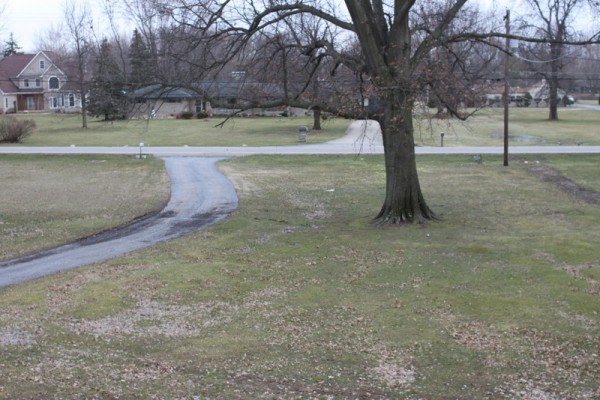
In the backyard, Jacob Sauer Tree Care recently removed a dying honey locust to give more light and eliminate the thorn hazards. We agreed to haul the brush and cut all wood to save costs, a chore that has taken many days. You may be able to spot a catalpa and oak tree Alex cut down further back in the yard.
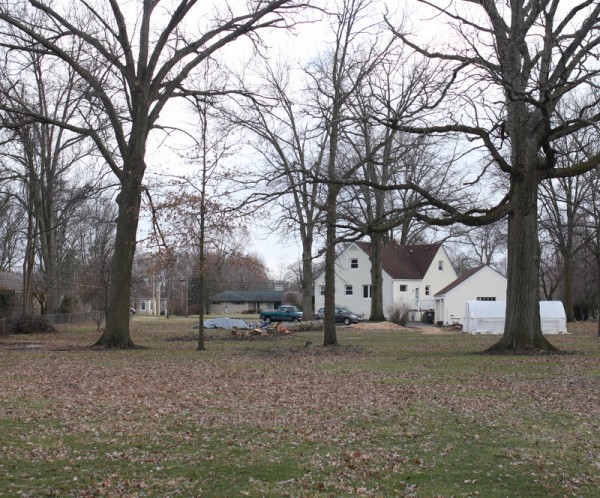
You can also see the hoop house in this picture, off to the left. We built a 10x20 foot season-extending structure over several work days with the help of many friends. One of three beds inside is already planted with greens and roots.
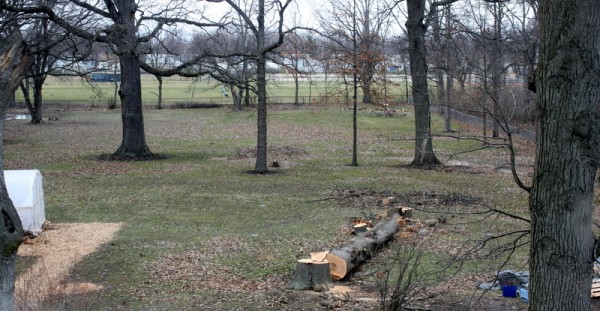
Here's the hoop house from the back of the yard. You can also see the dirt pile we're hosting for City Folk's Farm Shop*. That big empty area in the foreground? It's where the family who owned the house before us traditionally kept their garden. We'll use the well-drained spot for an orchard with alley plantings in between rows.
I have to admit I'm a little disappointed in how similar the two seasons appear for all the aches my body feels from working outside. Surely June 21, the summer solstice, will yield a totally different view.
*Alex, Lil, and I want to wish Shawn and Gerry at City Folk's a VERY HAPPY FIRST ANNIVERSARY! We love having this shop in our vicinity for homsteading supplies and education. They are hosting a homestead tool swap, chicken feed giveaway, silent auction, and more fun activities during their birthday week - go visit!