Holiday Books & Videos {Friday Five}

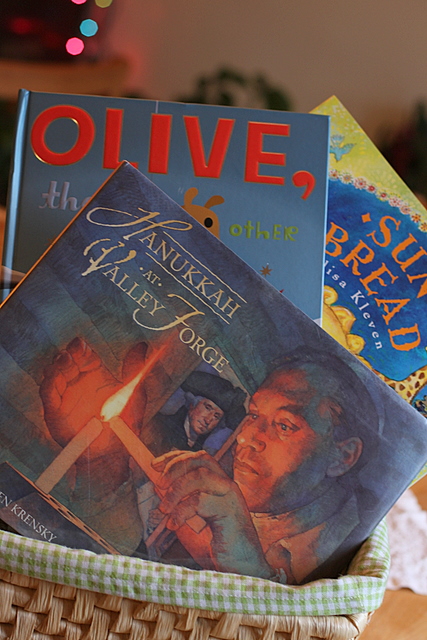
holiday book favoritesThe homestead is bustling like an elf shop these days with gift wrapping, cooking, hosting gatherings and attending others. We like to read holiday books and watch videos during the down time to get excited for the big day coming. Here are five we like this year: 1) Hanukkah at Valley Forge by Stephen Krensky is based on the true story of George Washington learning about the holiday from a Jewish soldier in the Revolutionary war. I like the retelling of the Hanukkah story in this book as well as the connection to a historical character Lil already knows. Beautifully painted illustrations by Greg Harlin complete the book.

2) Every year during Hanukkah we listen to Matisyaku's Miracle. The youtube video linked is full of fun but funky imagery and the tune is remarkably catchy.

3) Did you know that The Killers produce a holiday song and video each year? 2011's The Cowboy' Christmas Ball is our favorite with a music video full of wild west characters.

4) Olive the Other Reindeer is a remake of the classic Rudolph tale by Vivian Walsh. The story of a dog finding her place in the world is illustrated by J. Otto Seibold's computer-created cartoons. When I can stomach Drew Barrymore's voice, we also enjoy the 45 minute video version.

5) The Muppet Family Christmas is a perennial favorite of our family. The 40 minute movie includes Muppet characters from Kermit to Fraggles to Sesame Street in a story about friendship. At various points in the show, they sing holiday carols and original Muppet songs.

What are your favorites?

Really, Rugelach? {Wordless Wednesday}

child spreading jam for rugelach
spreading nuts on rugelachrolling rugelach
homemade rugelach holiday cookies

Lil and I made Mrs. Wheelbarrow's rugelach for a cookie exchange last week. Lil loved rolling peach, blueberry peach, and sour cherry preserves with almonds in the rich butter and cream cheese dough. She even made her own creation, chocolate with no nuts.

The recipe is time consuming and made me break up with my food processor but the results are outstanding. This is the perfect cookie for me - not at all sweet but full of flavor from homemade jams. Mrs. Wheelbarrow's recipe also suggests a bacon jam version which a friend made and paired with scotch. Yum!

Farewell, Food Processor

I stood over the bowl of rugelach dough, pulsing and pulsing with a growing feeling of failure. Like a flash in the pan, I realized why I dislike food processors: I cannot see and touch the food. I teach kids and adults in classes that the two most important tools in their kitchen are their hands. And it's true: preparing food is a physical activity for me.

My new-fangled safety-minded food processor is equipped with three separate locks that must be in place for operation. I fight with these stupid locks every time I use the machine. Place bowl on base, press 'on', nothing. Twist lid tighter, press 'on', nothing. Pound top funnel, press 'on', finally a little action. It's all in the name of safety, of course.

Which brings me to the second thing I despise about food processors: the blade. How does a sensory minded cook remove dough from the bowl? I reach my hand in. I've been down the road of using a sissy silicone spatula and the blade tears those up.

So what do you think happened to my finger while trying to scrape out the dough?

You can picture the next scene in my dramatic break-up with the food processor: removing the blade with a now bandaged finger, I scrape the dough into a bowl with a spatula this time. The food processor has not even done its job so I clench the spatula with the injured finger at attention. I finish mixing the flour, butter, and cream cheese into submission by hand.

I am over trying to understand the implied convenience of a food processor. My two hands are almost as good and they've never hurt each other.

Of course I didn't take pictures during this fiasco! Tomorrow I'll share photographs of the final product, which turned out beautiful and tasty.

Forcing Bulbs with Kids {Lesson Plan}

Every year I force bulbs into blooming to brighten the dull days of winter. Alex delights in the 'dominance over nature' implied by forcing but Lil and I just love watching things grow. This year, our bulbs became a science project for Lil.

child measuring amaryllis bulbLil chose several paper white narcissus and one amaryllis bulbs from our favorite local nursery, Oakland Park. Fancy-grade amaryllis can be very pricey but the $6 version thrill kids just as well as the unusual and expensive bulbs.

We set up the bulbs in little pots and jars around our dining room with south facing sun. Lil chose three that we would study.

child graphing height of flowers

We worked together to make a graph that would measure the height of the bulb. We labeled the x-axis with 'date' and the y-axis with 'height in centimeters'. We decided to measure from the top of the round part of the bulb and recorded our first height. Lil chose three symbols to represent the three different bulbs so we could record them all on the same graph.

Every two or three days, Lil measured and recorded again. After one week we had to add a second sheet of graph paper for the ever-increasing height of two of the bulbs.

In two weeks, two bulbs had bloomed and reached their maximum height. We thought we had a dud in the third bulb but now, three weeks after the forcing began, the third bulb is growing.

I used a similar set of bulb activities to teach measuring, estimation, and natural science to a class of second and third graders when I worked for Torah Day School of Virginia. They loved watching their individual bulbs grow, though we all agreed that twenty blooming paper whites in a room created an overwhelming smell.

Below, find a basic lesson plan for anyone who is unfamiliar with forcing bulbs and might want to do this with a group of children.

child measuring amaryllis bloomforcing bulbs science lesson plan

[print_this]

Forcing Bulbs Activity

Age: 6-10 years old Time: two weeks divided as 1 30-minute set up, 1 30-minute conclusion, 10-minutes every two-three days Objective: Gain experience measuring, estimating, and graphing. Observe parts of a plant and bulb growth.

Materials: 2-4 paperwhite or amaryllis bulbs per individual or small group of 2-3 students; bulbs should be specifically labeled for forcing, i.e. they have been exposed to very cold temps for at least 3 weeks. one half pint jar or other container per bulb sterile peat moss (for amaryllis) toothpicks graph paper (print your own here) foot-long ruler bamboo stake and twist ties (optional) pencil with eraser

Procedure: 1) Use toothpicks to suspend bulb just under the top of the jar or container. The thick base of the bulb should be slightly submerged in water when you fill the jar. For amaryllis, plant in a pot of peat moss with the skinny top well out of the soil.

2) Fill jars with water and water amaryllis pot.

3) Set up a graph with date along the x-axis and height in centimeters on the y-axis. Allow space for at least 14 days and 70 centimeters.

4) Use foot-long ruler to measure the initial height of all bulbs. Choose a consistent base from which to measure which might be the emergence of the white tip out of the brown bulb.

5) Every two or three days, measure height and record on the graph. Water when bulb is no longer touching water or soil is dry. Optionally, ask children to record their observations in a log for every measuring date.

Questions to pose: What is happening to the bulbs? Look on the top, the bottom, the sides. What are the parts called? Reference this bulb anatomy diagram as necessary. What do you think will happen next? How much do you think this bulb will grow in the next few days? When do you think it will bloom? What makes you think that? Which plant has grown the most? Which grew fastest? Use student generated graphs to answer.

6) As the plant becomes very tall, insert a bamboo stake in the jar/pot and use twist ties to stabilize if necessary.

7) Conclude by asking students to draw, verbalize, or otherwise express what they learned.

8 ) Enjoy the blooms!

[/print_this]

Are lesson plans something you would like to read more often? If so, what additional info do you need or what is extraneous?

Eating Before Christmas December 19, 2011 {Meal Plan}

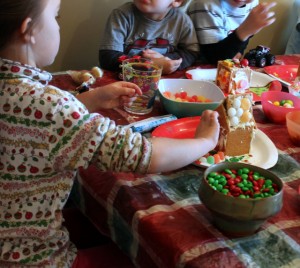
children making a gingerbread houseIt's here! The week of treats and gifts and family! We're trying to eat vegetable-heavy, non-holiday food as much as possible to balance the feasts that will come at the end of the week.

Meal Plan:

Monday - homemade chorizo and bean burritos with guacamole, salsa, and spinach

Tuesday - pad thai with bean sprouts and tuna chunks

Wednesday - homemade pizza

Thursday - Solstice Party in the morning. We're serving sun bread and chicken noodle soup. Eggs, waffles, and fruit salad for dinner

Friday - dinner with family at Lima's Lock Sixteen Restaurant

Saturday - hosting Xmas Eve dinner of roast goose and duck, mushroom pie, au gratin potatoes, kale and sweet potatoes, cranberry sauce, and popovers

Sunday - 'Ethnic Roll-up' potluck dinner wherein everyone will bring their favorite rolled foreign food. We're making pork tamales. Other dishes that might show up include sushi, lasagna rolls, stuffed grape leaves, cabbage rolls, and stromboli.

What are you planning to eat this week?

Links I Love {Friday Five}

Friday Five ButtonI apologize for another list post but my mind is stuck on them right now. I have gift lists, guest lists, and grocery lists scattered around the house. When not making or checking off my lists, I read these five great articles this week: 1) It's For You, Teacher Tom is a sweet reflection in the true meaning of gift giving, as observed with preschoolers.

2) If I Do Something Bad, Will You Still Love Me? by Amy Turn Sharp makes me feel all funny inside. She can do that with the shortest stories and I am always amazed.

3) The Chicken In The Snow is Lil's latest blog post. She wrote the comic after we saw a little snowfall and wondered how our chicken Austra must feel.

4) Alex pointed out the Most Popular Photography Tips, Tricks and Hacks post by Lifehacker. I hope to find some time to dig through all the ideas soon.

5) I was thrilled to see my name among the Charcutepalooza Semi-Finalists list. I am so appreciative of those who followed along and supported my meaty writing. If you liked my posts, click through to some of the other sites - I'm among some amazing bloggers!

Did you read anything great this week?

Hosting a Dinner Party? Tips for Low-Stress Entertaining

dinner party summer tablesetting I love to host dinner parties. This time of year, many people are entertaining family and friends in their homes. Here are my a few tips for lessening the stress of hosting:

1) Set the table first. It always puts me in the mood and is one task that is perfect to complete far in advance of the dinner hour. If children are around, I always ask them to help with setting out napkins and silverware.

2) Place water glasses and a pitcher on the table. This prevents thirsty folk from occupying the kitchen and leaves the hostess ready to serve other drinks.

3) Clean and put away all possible dishes before guests arrive. If you have an empty dishwasher or sink, plates can be whisked out of sight during courses and clean up later will run smoothly.

4) Establish 'stations' in your kitchen and dining area. You may need a drink station, buffet line, dessert station, or serving station. Be mindful of what utensils might be necessary at each station and lay out hot pads, silverware, drink glasses, etc.

5) Consider your menu carefully to please guests and make life easy on yourself. I err towards the side of simplicity and quality, usually serving one or two hot dishes and several prepared-ahead courses like salad or dessert.

6) Prepare (or ask someone to bring) an appetizer to occupy guests as they mingle before the meal. Think simple, fresh vegetables, cheese, or charcuterie that can be eaten without utensils or serving dishes. A make-ahead finger food tray frees the hostess to finish preparing the rest of the meal.

7) Assign roles if you are sharing host duties. Alex and I usually have a pow-wow an hour or so before the event to decide who will greet guests and who will staff the kitchen.

8 ) Once the guests arrive, take a deep breath and enjoy yourself! Plans do not always go as you wish but so long as you keep the spirit of the party alive, guests will never know if little details go awry.

drink station for dinner party

How do you do to prepare for a dinner party?


PS. These pictures came from the 'It Couldn't Be...' dinner party we threw in July. I needed a reminder today that someday it will be light and bright again.

Added to Simple Lives Thursday #74.

Give Them Real Tools!

child using a drill with adult supervisionA huge segment of the toy industry makes kids cameras, plastic hardware tools, faux art supplies, and character-branded naturalist equipment. The motivation for such things might be pure, but they are often cheaply-made, useless imitations of adult tools. I can't tell you how many 'kid' versions of tools have met their end in our donation bin. We toss the plastic screwdriver that doesn't actually work with screws, the cheapo watercolors that have no pigment, the child-friendly measuring cups that are cute but hard to use.

Use the Real Thing What's wrong with allowing children to use the real thing? If your child is distractable, keep your hands on the binoculars as they use them. Use the DSLR camera together or give them an outdated but still functional digital camera. Your ancient point and shoot is far superior to the kiddie version.

Buy genuine artist supplies at the craft or art store. Paints and brushes might be more expensive but they outlast and outperform the kiddie versions. While you are there, invest in some real artist paper or canvases.

Provide lightweight but real hammers and let children practice aim with the possible natural consequence of hitting their thumb. Because they are performing a real and honest task, chances are good they won't even complain about a small hurt.
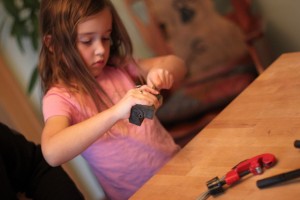
child sanding Process Not Product Young children (and most adults) learn more from the process of an activity than enjoy the eventual product. Sure, kids have great imaginations and should pretend to fly rather than actually attempt it. But when we can give our children real experience in the process of creating something, they will feel empowered. They will gain true skills and competence that faux tools do not allow.

Too Young or Too Expensive? I have high expectations for my six year old because she has been handling real tools from the moment she could handle tools at all. She has used sharp knives since she was three and power tools shortly after. Her mastery of one tool is rewarded with the next.

I believe that all kids can handle real tools when they are presented with supervised experiences from a young age. Expectations for safety must be held in the highest regard. If a child cannot handle themselves, the tool should be removed without punishment but a simple "you're not ready for this right now."

Some might argue that real tools are more expensive than the kid version. While this might be true, I think of purchases as an investment over time. It is not unrealistic to think that the genuine 6" santoku knife I bought for Lil last year will travel to college with her. Same with her quality flash light, sewing kit, and binoculars. Perhaps I actually saved money by skipping over the kiddie junk.

So what if something breaks? First, naysayers might be surprised at the durability of adult tools. Lil has dropped her ancient Canon PowerShot camera dozens of times and it still functions well.

If something does fall to pieces, so be it. Adults and children make mistakes that cause glasses to break and knives to bend. I use damage incidents to talk about whether we have a budget to replace it or if we can try to fix the broken part or if we might need to be creative and do without something for awhile. These are all natural consequences to an inevitable part of living.
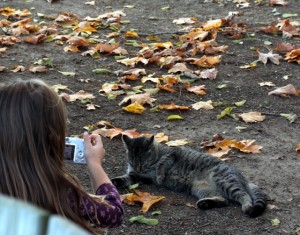
child photographing cat It's a Tool, Not a Toy The above phrase echoes around our house. Scissors are a tool and I expect Lil to use them safely or the privilege of using them is revoked. Matches must be consumed for a purpose - they are not play things. Use the strap to secure binoculars and cameras.

Lil approaches projects with sincerity towards the tools she might need. She isn't afraid of fire or sharp things because she practices using them safely under supervision. She still struggles with things that her small size body can't manage, like heavy hammers. If she comes across a project that requires a tool she isn't ready to handle, we assert ourselves as keepers of her safety and assist.

Does my daughter have good awareness because of something innate or because we encourage her to explore and create using tools? It's probably a little bit of both.

Each parent knows their child and must estimate how their child will handle a certain tool. Place safety at the forefront. Set them up for success by giving them new tools when they are fed and full of focus. Allow them to make mistakes and take time away from the project.

I know that I am not alone in raising a child who uses real tools. There are preschool classrooms of children who use saws and other mature tools. Why?

Because kids want and deserve the chance to make things.

Because trusting a child to operate a tool encourages them to trust themselves.

Because we don't know who will illustrate the world with watercolors or build inspiring houses or take amazing pictures or cook incredible dishes when they are given the right tools.