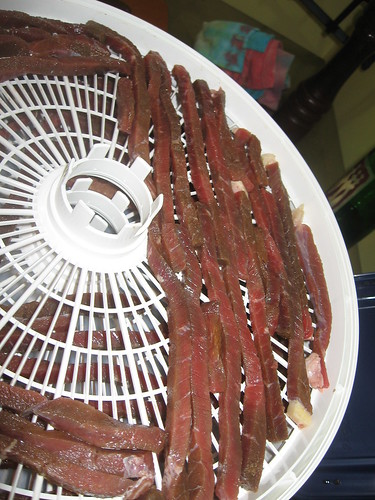
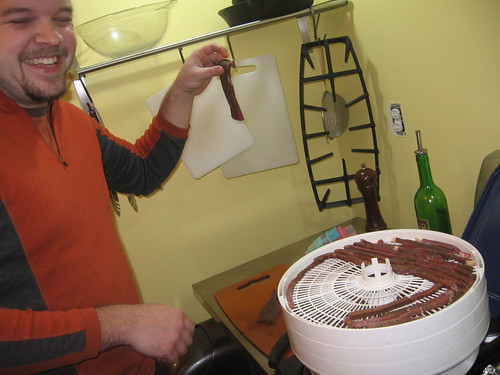
Bison Jerky - A High Protein Snack {Recipe}

dried bison jerky recipe

Jerky. This unattractive but nutritionally dense snack is something my family often neglects for months at a time. Then we'll remember and binge on homemade meat treats again.

Jerky appeals to the current paleo, low-carb, and low-fat diets. It's also free of most allergens and simple to make without extra equipment; we made it for many years in the oven before adopting the neglected dehydrator living in my parents' basement. Like many good things, jerky takes some time but not much active interaction. You simply cut the meat, marinate overnight, and dry the next day.

Lower fat meats work best for jerky. Turkey jerky, made from a whole turkey breast, is one of our favorites. This time around we used bison from Ohio Bison Farm for a beefy flavor.
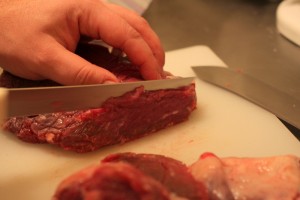
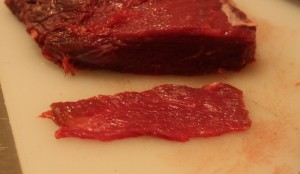
slicing bison for jerky bison sliced for jerky
Cutting the meat is the most skill-intensive step. The goal is evenly thin pieces that will dry in the same amount of time. Be patient and unafraid to use a meat tenderizer if necessary.

Whether you cut with or against the grain is up to you. Cutting with will result in a chewier product, against is more tender but may fall apart in a finely grained cut of meat.
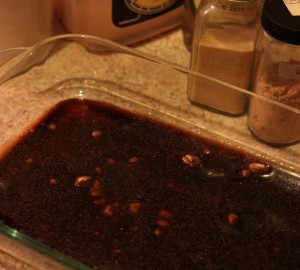
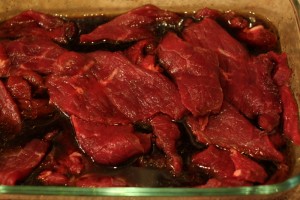
jerky marinade bison in marinade
The marinade does contribute to preservation but is not critical. You can make totally unseasoned jerky if you wish. We find that a balance of acid from vinegar or lemon juice, salt, a small bit of oil, and spices makes the best flavor. The two recipes below are ones we honed after a decade of experimentation. Feel free to tweak them to your tastes or ingredient availability.

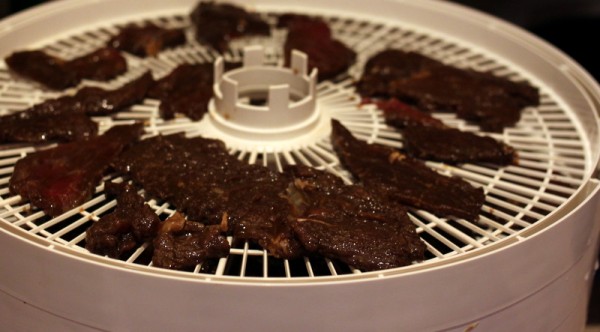
bison jerky dehydrating

Dehydration provides the preservative effect. The USDA recommends starting the drying process by heating the meat to 160 degrees F and then dehydrating at 140 degrees or the lowest temperature your oven will allow. Our dehydrator has a maximum temperature of 145 degrees F which is what we've always used.

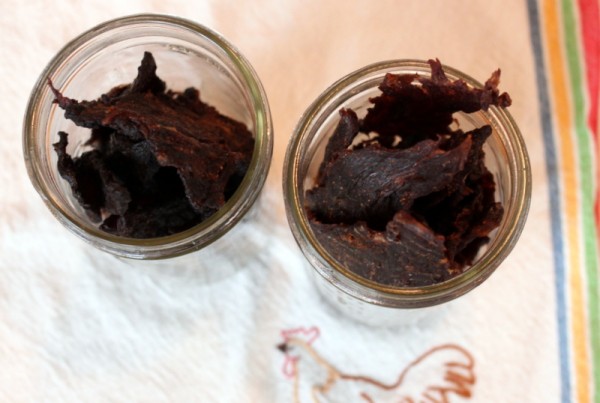
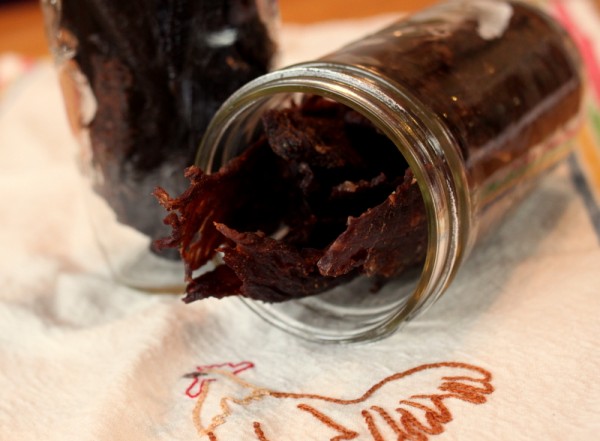
Store jerky in a glass jar or other air-tight container in a cool dry place like a kitchen cupboard for up to two months. You may also freeze jerky.

The whole family will be at the Clintonville Farmers' Market this Saturday, January 26, from 10:30 - 12:30 drying and sampling jerky. Stop in to shop for local foods and talk to us!

homemade jerky in jars

Bison Jerky Makes about 30 large pieces to fill quart jar Time: 2 days, 30 minutes active

1 pound bison roast per marinade recipe below; our four layer dehydrator can fit 2 pounds

Teriyaki 1/3 cup soy sauce (use wheat-free for a gluten-free product) 3 tablespoons rice vinegar 2 teaspoons honey or granulated sugar 2 tablespoons water 10 grinds black pepper 1 teaspoon ground dried ginger 1 teaspoon garlic powder 1 teaspoon sesame oil 1 tablespoon olive oil dash Sriracha (optional)

OR

Down East 2 teaspoons Old Bay seasoning 1 tablespoon honey 1 tablespoon lemon juice 1 teaspoon salt 1/2 teaspoon garlic powder 1 tablespoon olive oil 1/2 teaspoon paprika 1/2 teaspoon chili powder

1. Slice bison roast into very thin (1/8 inch) pieces. Pound uneven pieces thin with a meat tenderizer. 2. Mix all ingredients for one of the marinades and place in non-reactive glass or plastic pan. 3. Add jerky to pan, mix and cover. Marinate in refrigerator 24 hours. Stir once during this resting period. 4. Place meat in a single layer in a dehydrator or on cooling racks settled on cookie sheets. Dry at 145 degrees F or in a very low oven (as low as yours goes, or 200 degrees F with the door ajar) for 5-8 hours or until jerky is dry throughout and yields no moisture when broken in two. 5. Allow to cool. Store in an airtight container for up to two months.

Why Meet Your Meat?

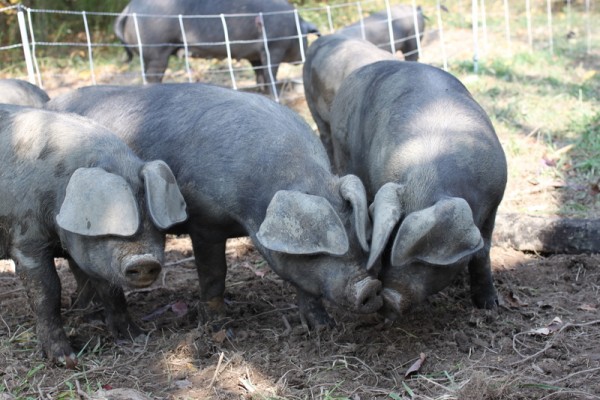
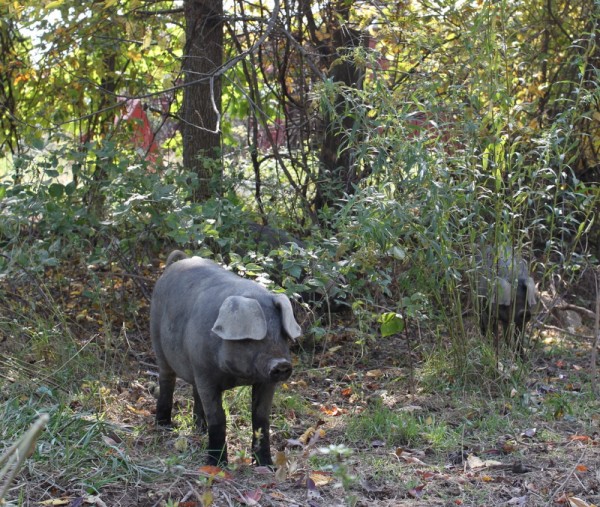
pigs at six buckets farm A few months back, an Internet friend of a friend said she had a couple unclaimed pigs in a litter she was pasture raising on her farm. Via Facebook, I asked a few questions, made a few offers, and confirmed plans to slaughter the pig ourselves.

Just as casually, I set up a time to meet my meat, a Large Black hog. I owed the farmer some homemade bacon and pancetta bartered for a deposit on the growing pig and wanted to see her homestead. It was a simple friendly visit, one of many farm trips I've made, with deeper implications.

I believe that everyone who eats meat ought to visit a farm where their poultry, beef, pork, or lamb comes from at least once. Here's why:

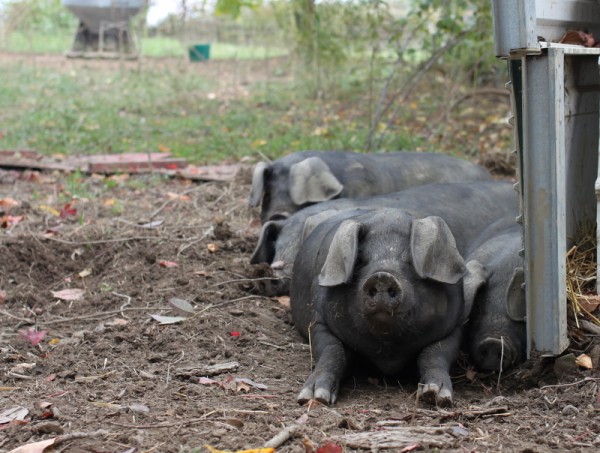
pig pile at six buckets farm

Realize Your Place In The Web of Life

Americans can buy butchered, trimmed, plastic-wrapped cuts from the meat counter that are as easy to cook as a vegetable. Simpler still, pre-cooked rotisserie chickens and frozen products only require a little reheating to serve. Restaurant dishes usually have no bones, scales, or other indication that the protein once belonged to a living thing.

This is all a fine, convenient thing, but it allows many people to be completely disconnected from the reality of eating meat. Eating meat - just like eating vegetables - requires that a living thing dies.

While some make the distinction between animals as sentient beings and plants as not, others argue that plants have feelings too. It cannot be debated that humans must eat something to survive.

Our place in the world is such that we can make choices about what we eat. Some tasty things, like pigs, pumpkins or lambs are cute. Thinking about an adorable hog dying for our morning bacon is difficult for some, but it must be faced. Death begets life.

pig at scrub forest edge

Ensure That Conditions Match Your Values

Farmers who raise meat animals have many options available in the feeding, sheltering, pasturing, and slaughtering of their animals. Consumers have many options about these same conditions. Home cooks should be able to ask the farmer or butcher about farm conditions at the point of sale. Producers should answer honestly and always do in my experience.

But seeing is believing. Watching pigs denude an area in a matter of minutes to make a wallow clued me in to their destructive potential. Witnessing chickens stand in the rain rather than run for shelter makes me realize how dependent they are on humans. Seeing an animal suffering from mastitis makes me feel thankful for the availability of antibiotics.

A trip to a farm shouldn't be an excuse to 'check up' on a farmer but to truly understand the benefits and consequences of different agricultural choices. If something you see doesn't jive with your values, ask about it and don't be afraid to change your eating habits.

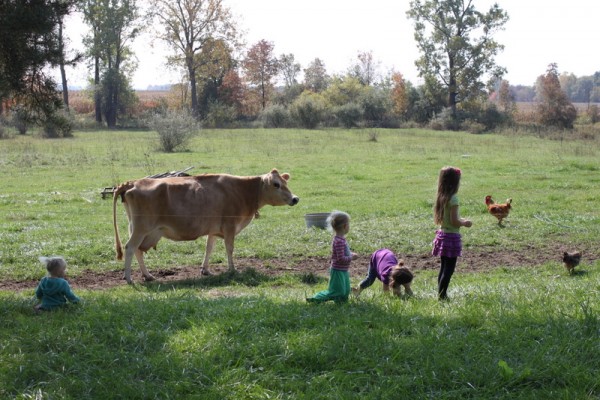
pastured milk cow

Appreciate the Farmer

I have never visited a farmer who was not passionate and proud of her job. And in the midst of showing off their farm, the farmer is constantly working - carrying water to hogs while talking about their breed, hauling feed while telling me about the source of the grain, or explaining what the half-built coop will look like when it's finished.

We all hear that farming is hard work. When you witness the morning milking, daily feeding, breeding and birthing, managing fences, and time spent harvesting, the toil becomes more tangible. You see that farming is hours on the clock and exhausting wear on the body.

I return home from meeting my meat with a feeling of abundant appreciation. I eat a meal knowing the labor spent converting sunlight into delicious calories. I give true thanks for the lives interconnected by the animal's diet, the farmer's effort, and my choice to consume ethically-raised meat when I can.

What do you think? Have you ever looked your meat in the eye?

Pork Pie Photo Journal {Charcutepalooza}

Click any picture to view full size.

1. Butter, homemade lamb lard, and flour. 2. Fats cut into flour. 3. Chopping homegrown onions. 4. Mixing egg and water for pastry. 5. Pastry dough on plastic, ready to chill. 6. Pastry dough chilling in fridge. 7. Grinder cooling in freezer. 8. Onions sweating in olive oil. 9. Chopping pork butt. 10. Lil picking fresh thyme. 11. Herb, salt, and pepper mix. 12. Bowls ready to grind. 13. Meat grinding. 14. Tattoo and ground meat. 15. Adding onions. 16. Aromatics and onions. 17. Binding. 18. Adding homemade chicken stock to bind. 19. Sausage complete. 20. Rolling set up. 21. Cutting dough. 22. Rolling pastry. 23. Getting ready to place meat. 24. Shaping meat on dough. 25. Meat on pastry. 26. Pastry trimmed. 27. Edges folded up. 28. Top on. 29. Egg washing. 30. Dirty dishes. 31. Cutting crackers from scrap. 32. Dog bone scrap crackers. 33. In oven after 10 minutes. 34. In oven after 30 minutes. 35. Temping. 36. Cooling behind pot barricade. 37. Transferring to plate. 38. Hound shaped top. 39. Hound sniffing. 40. Cooling in fridge. 41. Evening snack with pub ale. 42. Reluctant child. 43. Breakfast slicing. 44. Flaky crust. An epic 7 animal products from 4 species, 3 cooks, 6 hours.


This photo journal is our entry in the September Charcutepalooza challenge: packing. We used the recipe from Michael Ruhlman's book Charcuterie, substituting a small portion of home cured bacon for the ham and omitting aspic. We found the flavor and method to be spot on but the dough recipe made at least 30% more than necessary.


Additional Charcutepalooza posts:

Almost All-Ohio Mouselline

How to Make Hot Dogs Like a Girl

Mint Lamb Sausage Inspired by Jorgensen Farms

Taco Truck Chorizo Sopito

Red's Canadian Bacon or Why I Had to Kill a Pig To Eat Meat Again

The Story of the Rachel

Salt Cure Old and New

Cider Syrup Bacon

How To Make Hot Dogs Like A Girl {Charcutepalooza}

A story of a homesteader who meets her match in the common hot dog.

Go Girl!

standing on stool stuffing meat

Bone local beef with a sharp knife, grind it (standing on a stool because you're a short girl), and mix with salts. Feel so powerful that you go on to make cucumber relish.

The next day, you're ready to freeze, grind, freeze, puree, stuff, and smoke! There's a heat advisory, so shut the windows before you leave for morning errands and crank the A/C.

Hit a Snag

When you get home, it's hot inside. No noise from the air conditioner. It's ok, you are Super Homesteader!

Turn breakers on and off. Drive to the hardware store with fuses in hand, buy new ones, and replace them. Check the thermometer. Replace batteries here for good measure. Drink a beer.

Uh oh. It's still hot and you are out of your appliance repair ideas. Call husband, away on business, and complain. Call friend who was going to hot dog with you and cancel because it would be impossibly hard to keep meat cold in a house that is 85 degrees and rising. Call a repairman.

Cool Down

Repairman points out that the furnace fan isn't running because the idiot switch is disengaged. Turns out that the furnace fronts have been reversed the entire time you have lived at the house. Doh!

Drink a beer. Re-establish that you are a capable person by pickling and canning home grown cornichons.

Start Again

The next day, before even consuming coffee, start a fire in the charcoal chimney. Mix and freeze meat. Soak sheep casing. Grind and freeze again. Wash dishes. Stoke fire. Drink coffee.

bad holey sheep casingPush sheep casing onto the stuffer tube. Struggle. Think about how condoms began with sheep or hog intestines. Find a hole. Curse. Cut it off and start again.

Struggle, finding more holes. Curse, cut, do over. Call husband and complain. Cry a little.

Finally get enough casing on the tube. Set aside.

Puree near-frozen meat in food processor. Curse at the damn safety measures that prevent you from using a spatula while the thing is running. Give in to Ruhlman's suggestion that you might need to split the batch. Puree and place in stuffer chamber. Stoke fire, add chips.

Almost There

stuffing hot dog meat pureeSmile. You've done this part before. Start turning the stuffer handle that pushes meat into the casing. Oh no! Meat squirts everywhere!

Tie off a new end, turn again. Puree is still squirting out of pinholes in the casing. Curse. Cry. Pour bourbon creme liquor in the coffee.

Push meat into the stuffing chamber and place in fridge to stay cool. Pull out some hog casings and start them soaking in water.

Start calculating how many hours this process has taken you. Stoke the fire. Call husband and ask how to keep fire going with limited amount of charcoal left.

Start Again Again

smoking hot dogsRinse hog casings and string them onto stuffer tube. Pull out meat and begin stuffing again. Take questions from audience of your daughter and her four year old friend. Convince your daughter to open doors so you can lay hot dogs on the grill.

Wash dishes. Add wood chips to fire. Lend stuffer to friend so she can make brats and dogs tonight. Turn links. Stoke fire. Shoot some limoncello straight from the freezer.

Wait

Two hours later, internal temperature of dogs is barely 100. Sigh. Add more charcoal. Move dogs a little closer to the fire. Snap at the five year old who wants attention and then apologize. It's really the meat that's making you mad.

Recall that you don't really like hot dogs. Maybe that's why this whole process feels like a chore.

Eventually, give up on the smoker and bring the dogs inside. Wonder why a bunch of juice squirts out when the thermometer goes in. Bake them in the oven until the temperature reaches 150 degrees.

Reward?

funky hotdogSo fed up with the process that now cost you 1.5 days and hundreds of dishes, consider not even tasting the hot dogs. Remember that you are participating in this whole Charcutepalooza thing and you might as well at least take a picture. The dogs are wrinkly and misshapen but do taste ok with your cucumber relish.

Vow to never make hot dogs again. A girl knows when something is not worth the trouble.

Much thanks to Lillian, the five year old, who tolerated my inattentiveness and took pictures of me working.  She declares the hot dogs good enough to eat but wishes they were more greasy.

Handmade Holidays: Dad's Spice Rub

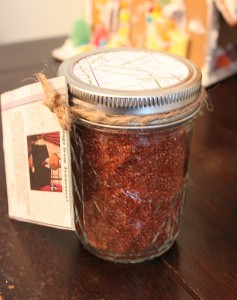
Last week I shared how to make hand-rolled beeswax candles. This week I offer recipes for this spice rub and cocoa mix. The series concludes next Monday with ideas for perfectly packaging your handmade gifts. homemade spice rub in decorated jar

My parent's kitchen counter always has a crock of this spice rub alongside the baking canisters. Dad uses this rub for large cuts of meat he later smokes and as a topping for grilled salmon. Because of the sugar content, this rub will flame if used over high direct heat.

When mixed up, this spice mix has an auburn color that looks lovely in a jar topped with a coordinating holiday fabric or an old map as pictured here. Tweak the spices a little, add a label with a catchy title, and you have a tasty gift sure to be appreciated by any cooks on your list.

Dad's Spice Rub from Where There's Smoke, There's Flavor by Richard Langer fills one half pint jar

2/3 cup dark brown sugar 1/4 cup paprika 2 tablespoon garlic powder 1 tablespoon ground cayenne (adjust heat here) 1 tablespoon ground black pepper 1 tablespoon ground white pepper 2 teaspoons ground coriander 1 teaspoon salt

1. Mix all ingredients thoroughly. 2. Store in a sealed container at room temperature. 3. Uses: coat meat with a layer of spice mix and grill or use as a dry rub for larger cuts of meat.

Other handmade food gift ideas: Liqueur Fruit Jam (apple, peach, or strawberry) Applesauce a loaf of bread (no-knead or cranberry) Sugared cranberries

Added to Hearth and Soul blog hop.

I'm Eating Meat Again

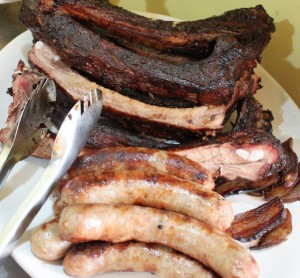
After a dozen years as a vegetarian, I have returned to an omnivorous nature. It all started after we killed and butchered Red the pig. The meat was so honestly procured and preparations so delicious smelling that I could not resist a few bites of bacon, then guanciale, then ribs and more.

pasture raised homemade sausage and ribs

I noticed that when I ate Red's meat, my tummy stayed full for a long time. I didn't eat extra starches. I wasn't hungry for a snack two hours later, a lovely feeling.  If I want to lose weight (a mere five pounds would bring me back to my high school weight) eating meat to stay full might be the way to do it.

I have never explained my reasons for being vegetarian on this blog because it is complicated. I initially started down the path because friends were vegetarian. Then I came to dislike meat because of the environmental degradation factory farming can cause. I couldn't quite stomach mistreatment of animals either.

Ultimately, my views have not changed, which is why I'm now a 'picky' meat eater. My self imposed dietary guideline is this: If honestly acquired, pasture raised meat is available, I will eat a small portion. I'll enjoy it in reverence for the animal's life and the hard work of those who raised and slaughtered it.

For the most part, this means I will remain a vegetarian restaurant diner.  As I don't want to be that annoying person who asks the source of every ingredient in a meal, I will still choose meatless options when dining with friends or family.  Even at home, we cannot afford high quality meat for meals every day so animal protein will remain limited in our meal planning.

As change is the only constant, I anticipate that my meat eating habits may be different at another time in my life.  Where are you on the meat/meatless spectrum?  How did you get to this place on your dietary path?

PS.  Today is the last day to vote for me to win a conference ticket to Asheville NC.  Will you please vote for @racheltayse?  Thank you!

Added to Two for Tuesdays real food blog hop.

Make it Yourself: Meat Jerky

We are posting this for Labor Day weekend in honor of all the people like us enjoying a family camp out this weekend.  We will spend 3 days at East Harbor State Park on the Lake Erie shore.  Expect another camp food post when we get home! So in line with all of our efforts to preserve/store food, Rachel had the idea that I should write a short post on making jerky.  The advantage to jerky is that it helps preserve meat for longer term storage than if it were fresh.  And, it tastes delicious!

Meat will still spoil eventually in jerky form but it will take much longer than raw meat.  Simple refrigeration will serve to keep jerky for an extended period of time (6 months +).

So what do you need to make jerky?  There are really only three elements: meat, seasoning/cure/marinade, and a drying device.

To start, what meat should you use?  Really you can use anything.  I have successfully used beef, bison, turkey, chicken, pork and even salmon.  I find I have the best luck with beef/bison and turkey.  You can use most any cut, but I would suggest something cheap as it is simply not necessary to buy a good, tender cut of meat and then process the crap out of it to make jerky.  For beef/bison, use round roast, rump roast, sirloin or the like.  For turkey, I just use plain turkey breast.  I like to cut the meat into thin strips prior to the marinating step so that the meat can get full exposure to the flavorings.   Cut the strips as thin as possible to aid drying later on.

For the seasoning or marinade there are two schools of thought.  You can either use a dry rub with lots of salt and or use a wet marinade.  Either way, you need to ensure that the salt content is high to promote preservation and drying of the meat (salt helps remove moisture content from meat).  My preference is a wet marinade made with equal parts oil and soy sauce, 1/4 part of lemon juice and then whatever herbs or spices I have around.  Sometimes I use cayenne pepper for an extra kick or just thyme/oregano for a more savory flavor.  Marinate or let it sit in the rub in the refrigerator until the meat feels firm rather than tender and you are ready to go.  This should usually be 2-7 days.

For drying, you can use a dehydrator, oven on lowest setting, racks in the sun and smoking with low heat.  Currently we use a dehydrator as it is the easiest method and causes the least mess.

Smoking is especially good if you want to impart extra flavor, but be warned that meats like chicken and turkey can really absorb the smoky flavor to an extent that they may become unpleasant to eat.

The oven is simple as most people have one.  Keep the temperature low enough (less than 200 deg F) to avoid cooking the meat, which can be achieved by keep oven at lowest setting with the door open or leaving the pilot light of a gas stove lit.

Sun drying can be contentious as many people are wary of leaving meat outside in the warm air for that long.  I find it works fine, you just have to figure out some way to keep critters off your product.

The meat must be thoroughly dry before you consider it done, usually 12 - 18 hours.  Try splitting a piece in half.  It should release no moisture and feel tough.

When it is finished, jerky can be stored in a container in the fridge for months.  Also, it can be taken hiking or outdoors with no refrigeration for multiple days at a time with no problem.  The salt combined with moisture removal does an excellent job of keeping the meat preserved.

2silos Farm Winter Meat CSA

To this point I haven't posted much on our kitchen/food blog. Rachel has been after me to remedy this oversight and now the Restaurant Widow has taken me to task over not posting about my meat CSA. First off, what is a CSA? If you are reading a food blog, I expect you know already. For those who do not know, CSA stands for Community Supported Agriculture. The basic concept is that at the start of the season you pay a local farmer or cooperative a certain amount of money (anywhere from $300-$600 is the usual price). In return, you receive farm products on a regular schedule. The products available are up to the farmer and usually reflect current production. Previously Rachel and I have participated in vegetable CSAs. It is quite fun and enjoyable to receive a surprise bag of vegetables, fruit, flour or honey on a weekly basis.

This fall I decided to try something new. 2Silos farm offered a meat CSA for the first time.  2silos supplies local grocery stores with a variety of organic, heirloom and free-range eggs. Their meat CSA started in November and is slated to run until April. So far I have received pork, beef, chicken, lamb, rabbit and a goose for Christmas. The pick-ups occur on the first Saturday of each month and I receive a bag of approximately 10 pounds of meat products.

Cuts have been quite varied. I have had london broil, flank steak, round steak (made into jerky below), NY Strip, ribeye, and ground chuck from the beef family. As far as pig products, I had so very nice tenderloin medallions, loin chops, and bulk breakfast sausage. Each month, I receive a whole frozen fryer and a dozen eggs. The lamb has been ground and also in packaged chops. I just cooked a whole fresh rabbit last week and it was delicious. I also apparently have game birds to look forward to in the next couple of months (quail, pheasant, etc...).

making beef jerky (make it yourself post coming soon)

The goose I ordered for Christmas has been one of the highlights of the meat CSA. While not an included feature of the CSA, the Christmas Goose option was only an extra $25. For anyone who has ever bought goose, you will know they generally run about $30-$35 for a frozen goose. Prior to this goose I have never cooked a fresh goose. This was hands down the most delicious goose I have ever eaten. I put it in a simple brine and then used Julia Child's steam-roasting method to cook it. It was incredibly tender and everyone loved it at Christmas-eve dinner. I have to give credit to 2silos for raising a very flavorful bird.

I also receive odds and ends each month. So far I have found pig kidneys, pig liver and chicken liver in my grab bag. I am still trying to decide how to cook the pig offal, and will update when I do. The chicken liver and goose liver made an excellent stuffing for the Christmas goose.

Overall, I have really liked this meat CSA. Denise at 2silos has done a great job running it and communicating with the participants. We receive a monthly newsletter and Denise is quick at answering any questions. The meat has been of very high quality and of a nice diversity. I like being able to easily receive a more than generous quantity of meat each month that is raised by a local farmer. Since the CSA began I haven't had the need to purchase any meat from a grocery store.

The intangible benefit of CSA participation is that not only do you get really high-quality product on a regular basis, you support your local agricultural community. Many farmers are being forced out of business by large scale factory and commercial farming. To survive, farmers have turned to non-traditional methods to generate revenue. Some have explored niche markets like heirloom vegetables and animals. Others have gone the organic route. Establishing a CSA is a very good way for a farmer to make a guaranteed income over a season.

So take a look at the 2silos meat CSA. Denise is accepting applications now for the CSA that will run over the summer. And if meat isn't your thing, consider one of the many fine vegetable CSA's that are available in the Columbus area. Either way, you will love the diversity of food you receive, and you will have the satisfaction of supporting a farmer in your local community.